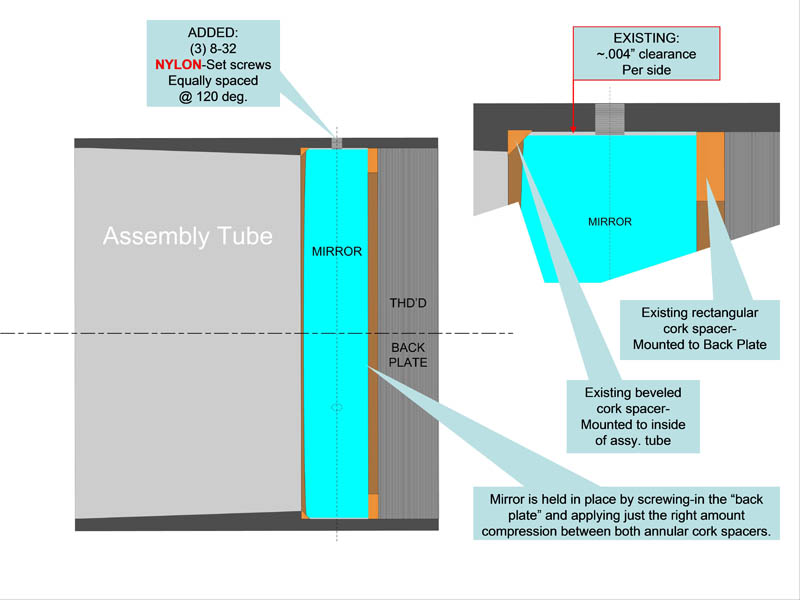
Deep Sky Instruments- RC10c Modification PROBLEM- Collimation of Tak Dot moving around with scope at different altitudes. I discovered that my secondary mirror was too loose and could shift ever so To help make the adjustment less critical I modified the secondary mirror tube. I added (3) small plastic/nylon set screws/equally spaced and centered on the outer diameter of the mirror. NOTE: Added 3 more- 6 equally spaced, for better support. See the drawing below. NOTE: If this project is taken on, great care must be exercised........SEE THE DSI MANUAL for proper dis-assembly and re-assembly of the seconday unit and primary mirror assembly. Also, very important when removing the secondary unit. Remove only the 3-mounting screws. Leave the collimation screws exactly where they are, so that when you re-assemble the collamation may return to where it was before dis-assembly. The secondary must be removed through back of scope after primary is removed.....see drawing below.. |
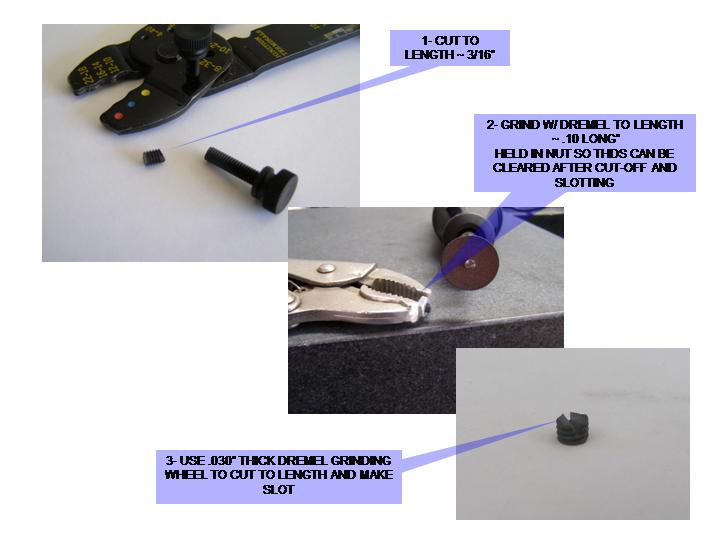
SET SCREWS USED FOR SUPPORT These srews were made from nylon thumb screws. |
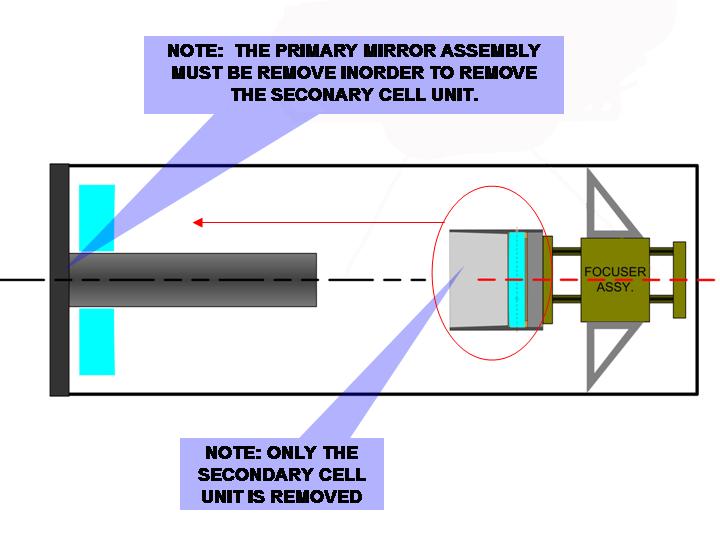
REMOVING THE SECONDARY UNIT Primary assy must be removed 1st to get the secondary out the back........it can't get out the front. The Focuser blocks it and according to Rich it's probably not a good idea to upset or remove the Focuser Unit. |
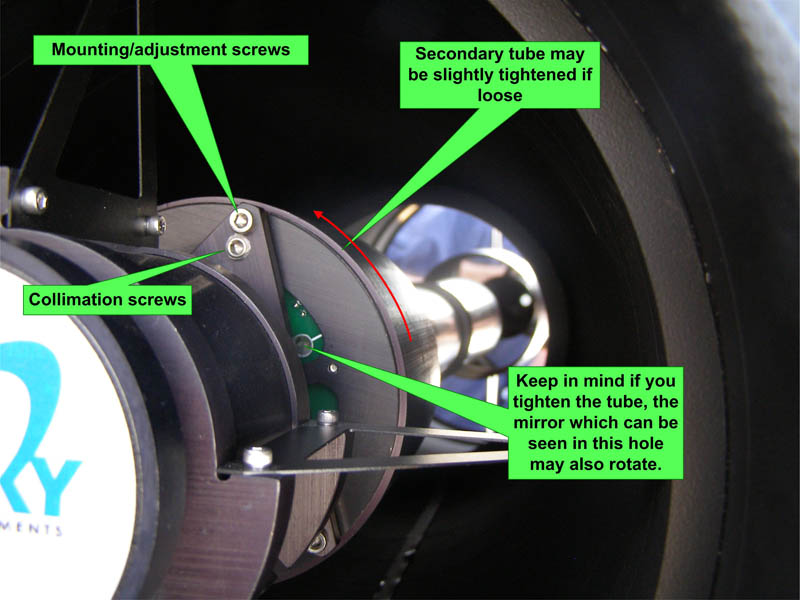
TIGHTENING THE SECONDARY UNIT, IF LOOSE If you decide to just tighten the outer tube slightly, keep in mind the mirror will most likely rotate to. According to Rich, just a slight rotation will not effect the optics. Unfortunately, as in the case of my scope the index mark on the back of the secondary was not visible in the hole that you can see. There is another hole which is covered by the mounting bracket. So, if things get moved too far, the only solution is to take out the secondary and re-index (see manual) the mirror. A good idea, would be to put a small dot on the mirror through the visible hole before you tighten, so you have some idea how much the mirror may have turned. |
NEW UPDATE- ON TAK DOT CENTERING Even with this modification, which has provided noticeable improvement over the last year, I am still noticing more movement of the Tak Dot at various Altitudes and Position Angles lately. I have added a Pyxis Rotator. This adds another variable to be checked; the true indicator runout (TIR) of the image train at the camera adapter surface as it rotates through 360 degrees. To check the collimation with the TAK Scope and make it easier to use with longer more extensive collimation sessions, I've added a Web Cam for viewing the TAK DOT. Also, see link for checking Image Train TIR. See links for TAK SCOPE MODIFICATION and IMAGE TRAIN TIR |